Step 6: Add Media to Drop Zones
iDVD themes can include no drop zones, multiple drop zones, and even dynamic drop
zones that move in the background of a menu. A drop zone isn’t a button; it’s an area
where you can place media that adds interest to the menu background. You can place
a single image, a slideshow, or a movie in a drop zone.
You can add any combination of images, video clips, or slideshows to the drop zones in
your project. You can also hide the drop zones on any menu so that they don’t appear
in your final project. With your pointer over the menu (and with no buttons or text
objects selected), press Command (x)-I to open the Menu Info window. Then deselect
the “Show drop zones and related graphics” checkbox. The drop zones on the menu
immediately disappear.
The Soft Frame Main menu contains three drop zones, which “play” in sequence on the
main menu. Therefore, only one drop zone shows at any time on the main menu. The
easiest way to determine how many drop zones a menu has is to click the Drop Zone
button. This brings up the drop zone editor, which has a well for each drop zone the
menu contains. To return to the main menu, click the Drop Zone button again.
In this step, you’ll fill each of the three drop zones in the main menu using the drop
zone editor. You’ll add a slideshow to one of the drop zones, which is similar to the
process of creating a slideshow described in “Step 5: Add a Slideshow” on page 14.
To add media to drop zones:
1
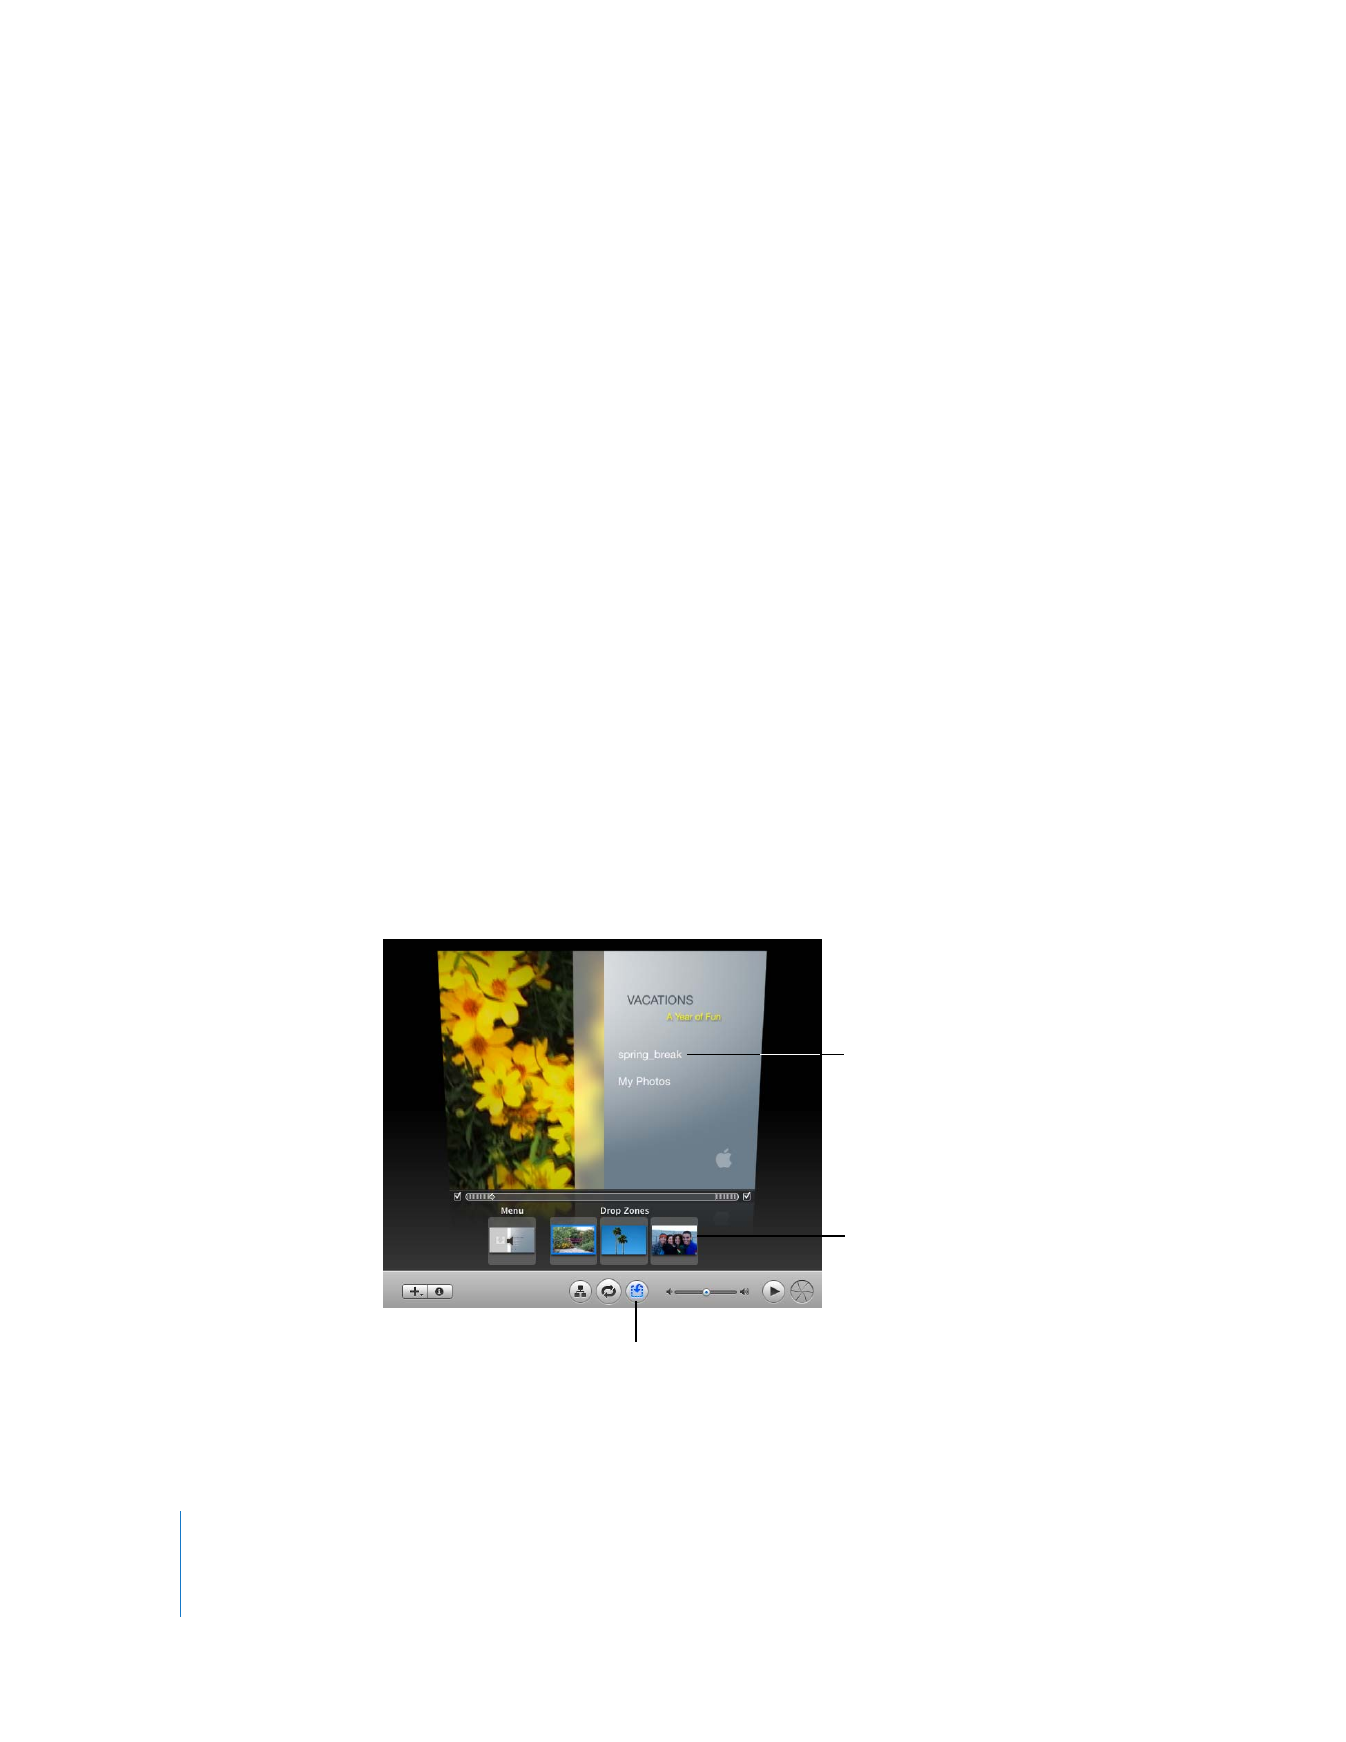
Click the Drop Zone button. The drop zone editor, shown below, appears.
2
Click the Media button, and then click Movies at the top of the Media pane.
When you‘re working in
the drop zone editor, your
project’s menu shows in
the iDVD window.
The drop zone editor
includes three drop zone
wells, which means the
main menu of this theme
includes three drop zones.
Drop Zone button

Chapter 2
Learn iDVD
19
3
Drag a video clip from the Movies pane to the first drop zone well in the drop zone
editor.
Unlike with photos, the video clip is not resized to fit into the drop zone, so some of it
will likely be cut off in the drop zone.
Note: It’s not recommended to add a long movie to a drop zone because a movie can
use a lot of space. Also, a viewer is unlikely to stay on a menu enough time to view a
long movie.
4
Click the Drop Zone button again to return to the main menu.
Notice the first frame of the video clip showing in the drop zone.
5
Click the drop zone.
A movie pane, with a slider to set where the clip starts and ends in the drop zone,
appears. Move the sliders to change which part of the clip plays in the drop zone.
This is an easy way to shorten a video clip in a drop zone.
6
Click the Drop Zone button to return to the drop zone editor.
7
Click the Photos button at the top of the Media pane.
8
Drag a single image to the second drop zone well in the drop zone editor.
9
Drag a photo album or folder of pictures from the photos list to the third drop zone
well.
The first image in the album or folder shows in the drop zone.
10
Double-click the third drop zone well.

20
Chapter 2
Learn iDVD
This opens the drop zone slideshow editor, which looks like the slideshow editor you
used to create your DVD slideshow in “Step 5: Add a Slideshow.” You’ll see thumbnails
of all the images you added.
11
Drag the images into the order in which you want them to appear and delete any you
don’t want to keep.
You can also drag other images, from the Photos pane or elsewhere on your computer,
to the drop zone photo editor.
When you’re done arranging images, click the Return button to return to the drop zone
editor.
12
Click the Drop Zone button to return to the main menu.
13
Click the Motion button to see how the drop zones cycle or “play” on the main menu.
The images will “loop,” or play continuously, so click the Motion button again when
you’ve seen enough.
14
To save your work, choose File > Save.